Overview of Properties
All of the properties for projects and objects are described centrally here.
Properties are defined by means of the respective property lists.
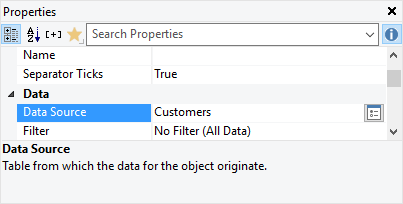
* Upon doing so, the properties can be sorted according to category or alphabetically via the corresponding buttons.
* Press the +- buttons to hide or show constant formulas (e.g. False).

Figure 13.1: properties tool window
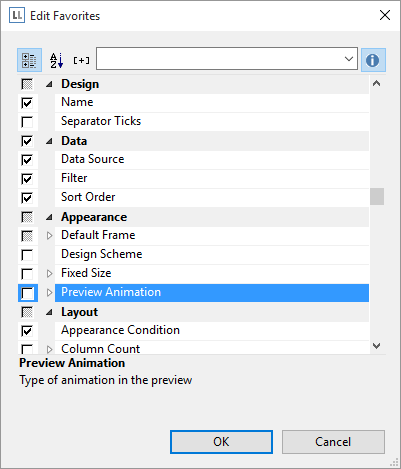
* Press the Favorites button to select the features that you use most often. Unless you have selected your favorites, all other properties are hidden by default. Press the Favorites button again will display all properties again. To open the selection dialog for the favorites again right-click the favorites-button.

Figure 13.2: Edit favorites properties
* Use the input field to filter the properties.
* If you select multiple objects, you can set their common properties at the same time.
You can specify values in different ways depending on the property.
* Open a drop down list of values by means of an "arrow down" button.
Example: Appearance condition, font color, font. At the end of the list of values, you will almost always find the "Formula" entry.
* You can set the value with a formula via the formula button or the "Formula" entry in the list of values.
Example: If you want to set the font color to red for negative values, set the default "property" for the font to "False"
and define the "Font color" property using a formula, e.g.:
Cond(Item.UnitPrice< 0,LL.Color.Red,LL.Color.Black)
* Open a configuration dialog with the "..." button.
For example, there are dialogs for the following properties: formatting, font, frames, position, label format.
* Enter the value directly in the property fields.
Example: Project description in the project properties.
* Set a file path with the open dialog.
Example: Name of the project include file or the image file.
See also: